September 20, 2010

Circuit-bending at It’s a Geek’s World

Yesterday I led some circuit-bending workshops as part of It’s a Geek’s World, in turn part of the British Science Festival.

Here’s what we were making:

Circuit bend for It’s a Geek’s World. from nikkipugh on Vimeo.

The hall soon filled up and Furby and Alphonso made lots of friends. I didn’t get much of a chance to take photos until Sam’s midi-octopus performance at the end…

Stand by for more circuit-bending workshops in the near future…

Sonar goggle detector

Since some friends went on a bat and moth walk (and I’d idly Googled bat detector kits) I’ve been curious about building my own bat detector.

A few things came together and we ended having a lot of fizzPOP conversation about bat detectors. Then I started work on a school project for which an ultrasound detector would be rather nice.

It was kind of inevitable that I’d make one then!

Working from Tony Messina’s Simple Bat Detector project, I gathered together the basic components and tonight managed to get a breadboarded prototype working.

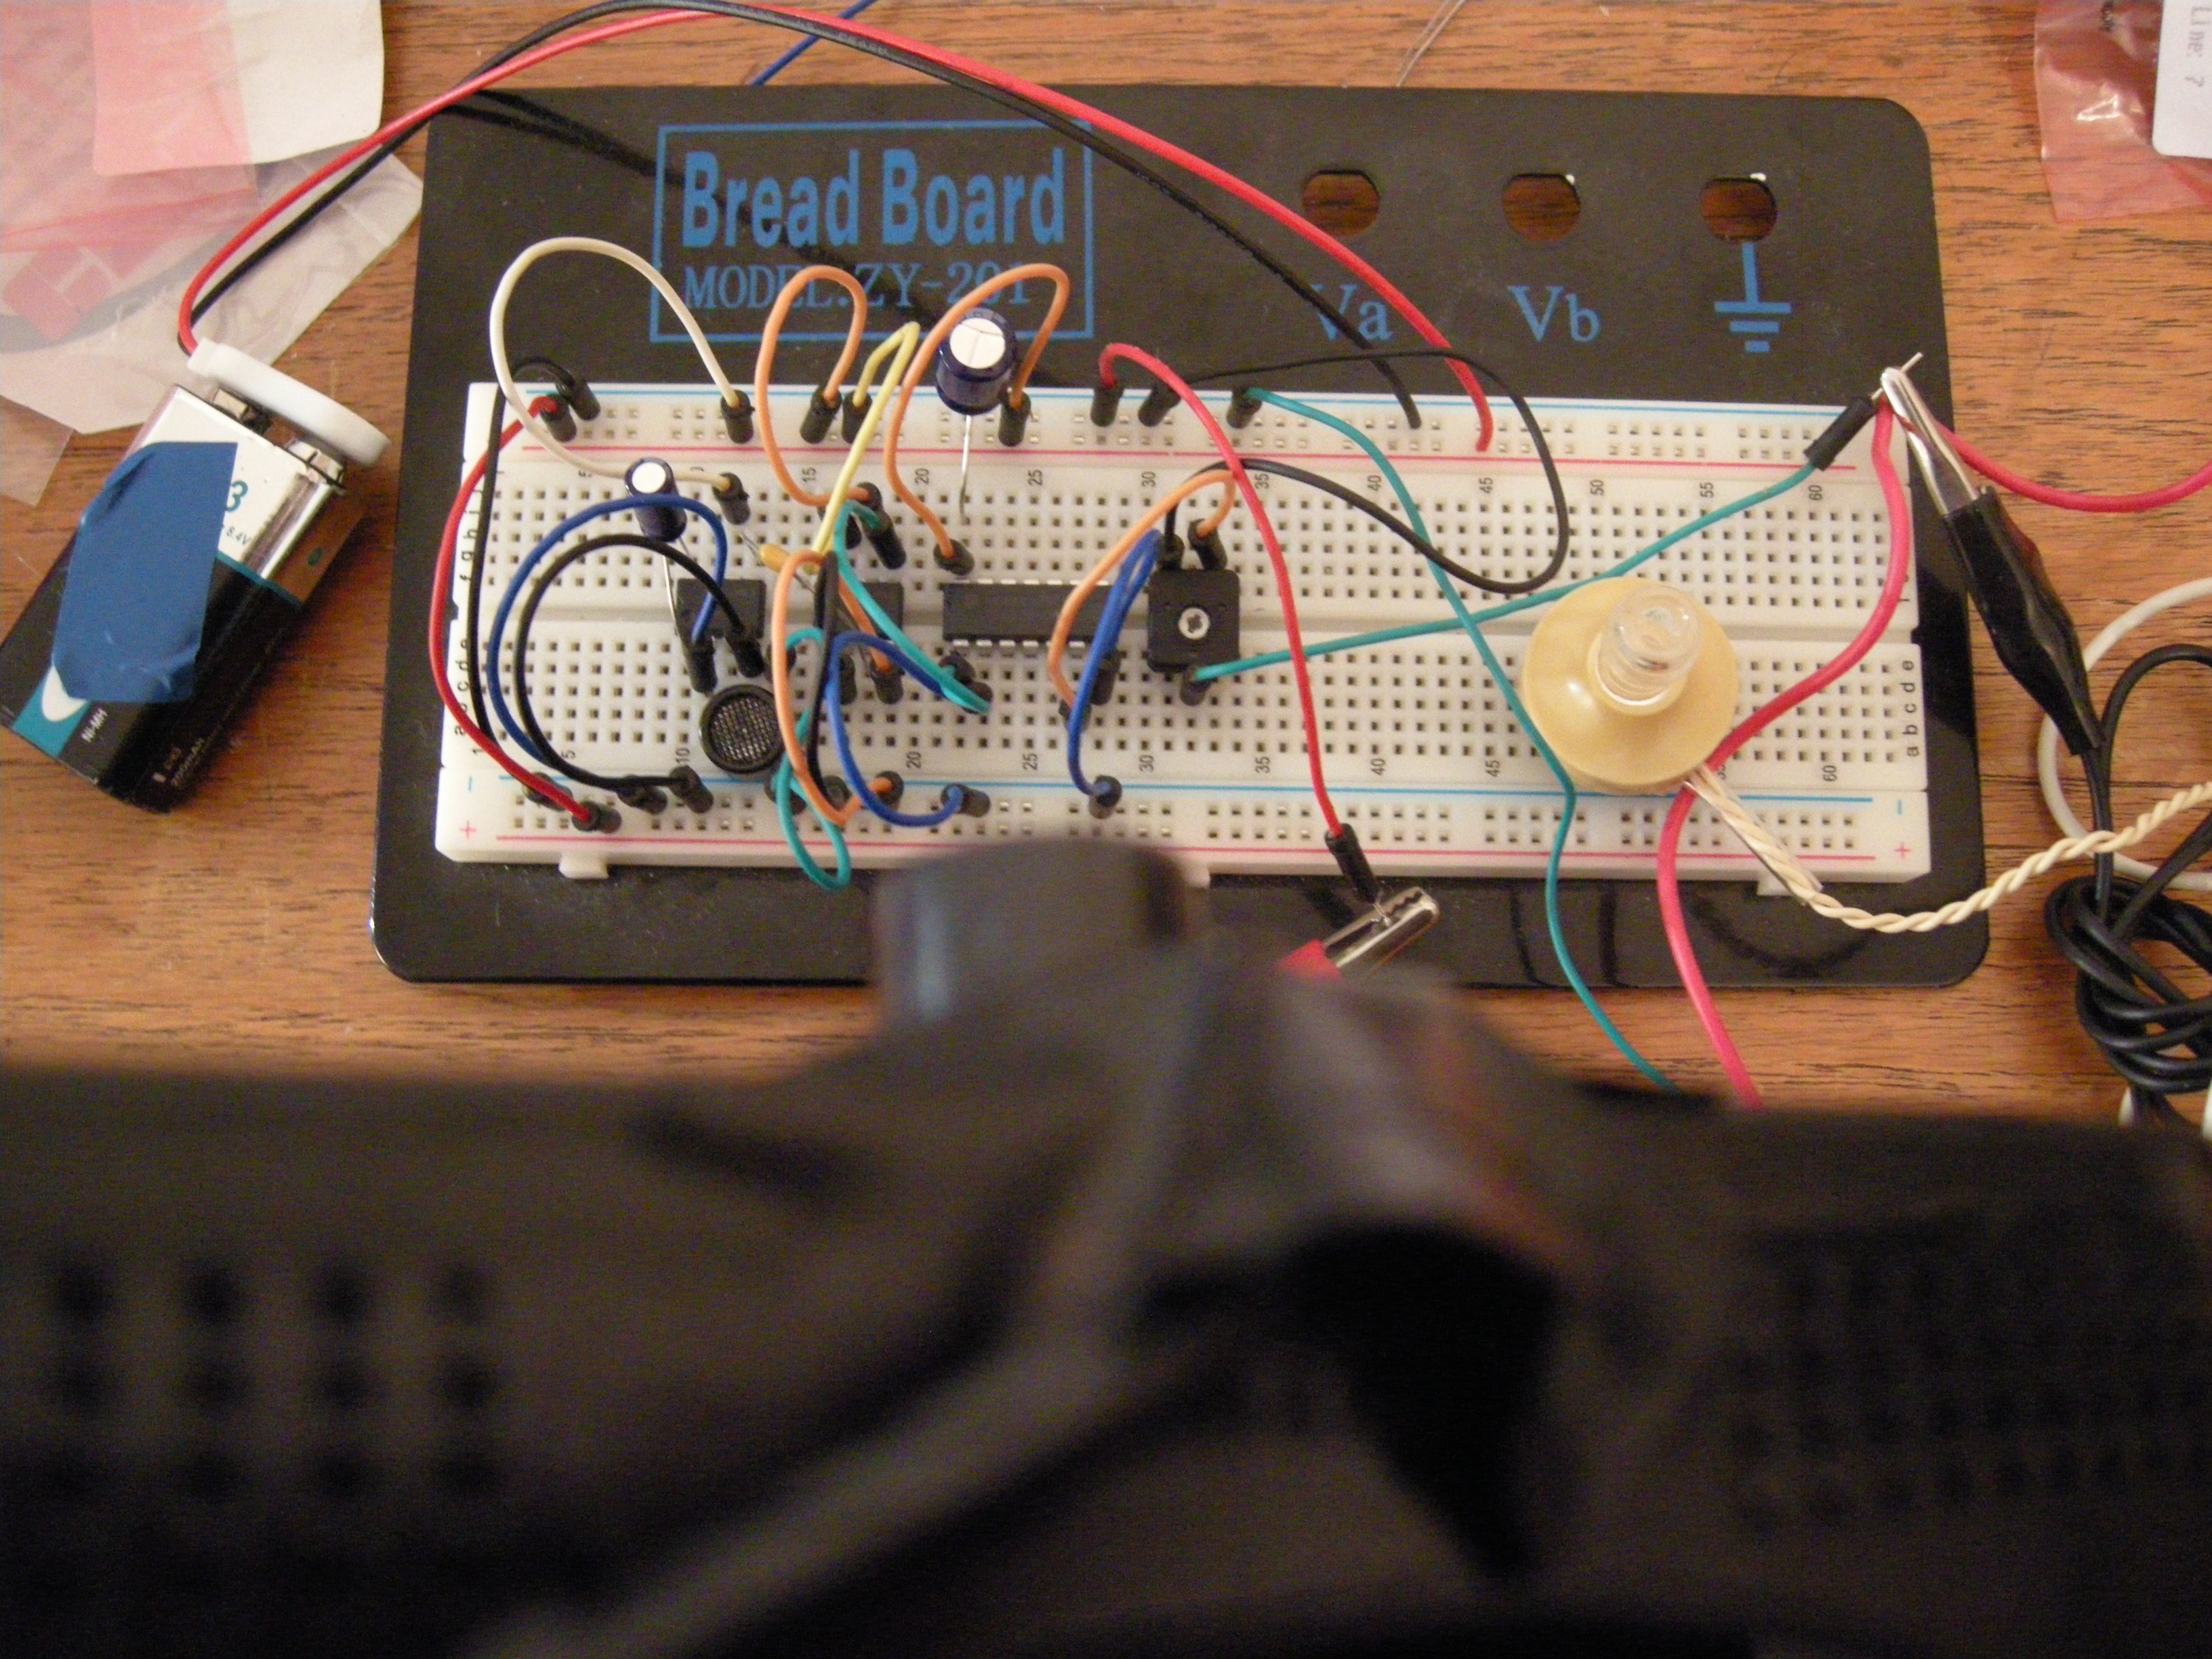
It occurred to me that building something that reacts to ultrasound may not be the easiest of circuits to test… Fortunately, I had some sonar goggles to hand and the detector reacts to them!

Breadboarded circuit with sonar goggles looming overhead

Breadboarded circuit with sonar goggles looming overhead

sonar goggle detector from nikkipugh on Vimeo.

Mr Mabbett also suggested placing the detector near a TV set (which I don’t have) or some jangling keys (which I do!) to test it. There are some good clicks coming from the keys test too, so next step is to get the circuit soldered up onto stripboard and into an enclosure of some sort.

As well as the schools stuff – where we would be using the detector to reveal sounds beyond our hearing – I’m interested in running workshops for people to build their own detectors. I also have some crazy game ideas…

News reports from the Pod in the Quad project

As part of my first ever schools project I enlisted the help of a friend to make a few news reports for the pupils to interpret. I appear not to have gathered them together so I can find them easily.

I should do something about that.

Cocoon at the White House! from a_selwyn on Vimeo.

3DDF Eilmeldung from podwatcher on Vimeo.

JHKニュース from podwatcher on Vimeo.

Map for something you cannot see

I’ll be using The Anticipator on Monday to try and locate the source of a mysterious noise, so over the last few days I’ve been dusting off the cardboard hardware and the (now defunct) mscape software.

The Anticipator: now with power indicator, LED bezels and several layers of what I hope will be waterproof spray...

The Anticipator: now with power indicator, LED bezels and several layers of what I hope will be waterproof spray...

I’ve tarted up The Anticipator a bit to hopefully improve its usability – bezels for the main series of LEDs and also a power indicator. We’ll be using it no matter the weather, so I’ve also given it a few coats of waterproofing. (Not that I’m feeling pessimistic at all, but I’ve also given myself a new waterproof coat too!)

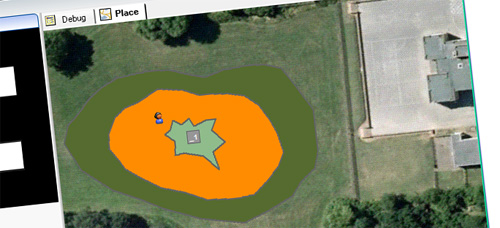
I’ve put together a first draft of the GPS zones I’ll be using over the school field to represent the presence of our mysterious noise-making object and tomorrow I’ll be in Leicester giving it a test run.

School field with GPS zones overlaid

School field with GPS zones overlaid

Oh, and we’ll also be testing the field with a metal detector, just to make sure we don’t get any derailing surprises on Wednesday next week when we do it with 50 kids watching!

Circuit-bending workshop at the British Science Festival

On Sunday the 19th of September I’m running three 1-hour circuit-bending workshops as part of the It’s a Geek’s World event, 10-4 at Aston University’s Students’ Guild Hall. (geeks_world on Twitter.)
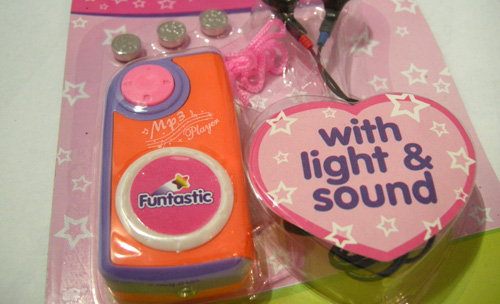
Toy mp3 player, soon to be more with light and sound than the manufacturer anticipated...

Toy mp3 player, soon to be more with light and sound than the manufacturer anticipated!

We’ll be converting one of these toy mp3 players so that the sound it makes is controlled and distorted by light.

Circuit bend for It’s a Geek’s World. from nikkipugh on Vimeo.

The mod is pretty simple – so don’t worry if you’ve never soldered before – and as you can see from the video above the results are very engrossing. The kits come with earphones, so you can even play with them for as long as you like without risking familial discord! Alternatively… there’ll be another workshop where you can make your own audio amp. Yeah!

We'll switch over a couple of components to make the toy sensitive to light.

We'll switch over a couple of components to make the toy sensitive to light.

The workshop costs £3.50 and at the end of it you’ll have your very own bleepy chirpy tinkly thing to keep.
To reserve your place in advance you need to register on the It’s a Geek’s World website and then you can sign up for the different activities. There will also be a few places available to snap up on the day. My workshop runs at 10:15, 12:15 and 3:15.

The website is mostly booking system and doesn’t really show much of what will be going on, but take it from me: if you like gadgets, robots, and/or electronic noise then this is the place to be.

There are several workshops on offer throughout the day, ranging from learning to solder through to making a Beat Box sequencer with Mr Underwood. Something for everyone!

Nottinghack will be there with Drawdio kits. We had a fab evening when they came to fizzPOP for a Drawdio workshop, so that’s also tried, tested and approved!

We’re not neglecting the blinky light side of things either – there will be workshops for making these colour-changing boxes and a few other LED treats too.
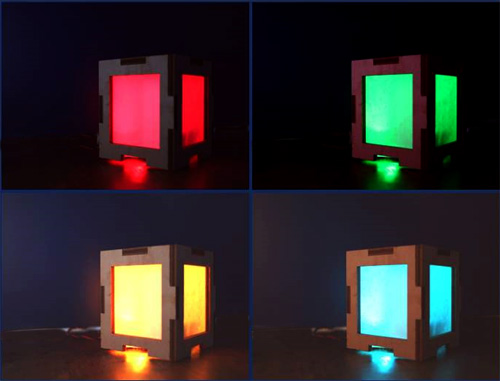
Colour-changing light box

Colour-changing light box

As well as the workshops there will be people from Curious Minds (they of the Star Wars Force Trainer), oomlout, RobotBits and others. Expect interesting things to see, touch and interact with.

Others from fizzPOP will of course be there too, so come along and say hi – we’ll say hi back if we can hear you over all the bleeping noises!
Photos from the MakeIt Zone

I went along to the MakeIt Zone open day last weekend.

A very interesting space in Balsall Heath with traces all over the place of the printing company that operated from the site for a hundred years or so until about 18 months ago (iirc).

MakeIt Zone

It’s currently in the process of being re-purposed as a studio and workshop complex for makers of all sorts, including gallery space and a café. Get in touch with them if you’re interested in finding out more, renting some space or otherwise supporting the project.

It’s a massive site and I spent about 3 hours there looking around on Saturday. Here’s a slideshow of a few of my photos:

EMF detector

Again for the school-project-that-I-cannot-mention-explicitly-by-name-because-of-Google.

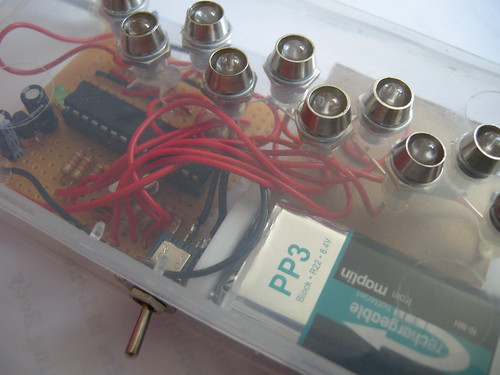
As an extra tool for us to use in our investigation into the unseen, I constructed an Arduino-based electromotive force (emf) detector. I’ve made breadboard versions of this before, but now it was time to build something a little more permanent.

barebones Arduino, 10 LEDs and a plastic case from a pound shop screw set

barebones Arduino, 10 LEDs and a plastic case from a pound shop screw set

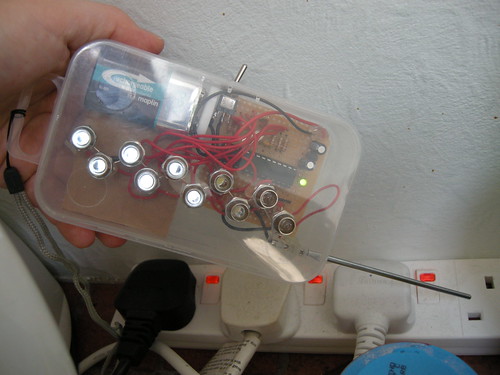
The LEDs light up in proportion to the strength of electromagnetic field detected. Since electrical currents are intrinsically linked with magnetic fields (can’t quite remember my A-level Physics) placing the antenna near to power sockets and electrical items light up some of the LEDs.

4-way gang lights em up

4-way gang lights 'em up

bing

bing

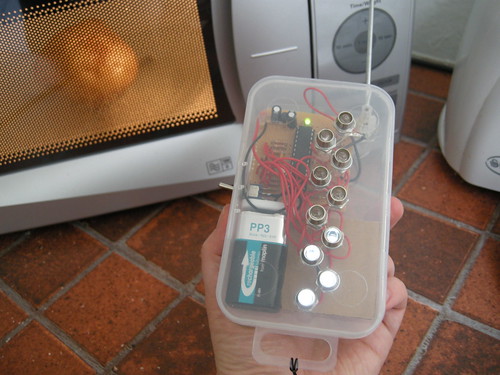
The microwave seems reassuringly well shielded:

But my clock radio and bedside lamp are a tad alarming!

It’s very interesting hunting around the room for different effects. Orientation of the antenna changes the number of lit LEDs, as does switching things on and off. I’m curious to see how the detector responds to big classroom equipment such as smartboards and projectors, but of course the main point is observing how the children respond to being able to visualise things they wouldn’t otherwise be aware of.

Noise for something you cannot see

Earlier this week I had a planning meeting with the Y3 and Y4 teacher of a school I’m working at. The theme of the project will be based around the idea of investigating the things we can’t see.

The doings will kick off with me coming to the school asking for help in locating the source of a strange sound. I’m not much of a sound engineer, but when my tummy started gurgling enthusiastically after a breakfast of cold pizza this morning I grabbed my binaural mics, a digital voice recorder and the opportunity to see what would happen if I manipulated the sound a bit.

Here’s a gurgle amplified, noise removal-ed, slowed down, lowered in pitch and then overlaid with slightly off-set versions of itself.

Listen!

Note to self: must make more notes to self so I can reproduce the sequence of applied effects.

Third party nunchuk plus Arduino

I’ve just got an Arduino to read data from a cheap third party wii nunchuk controller.

Because it wasn’t a genuine controller, it had 5 wires instead of 4 and the colours didn’t match with the tutorials [windmeadow] [TodBot Bionic Arduino class 4, pdf] I could find online.

I had to do a bit of experimentation to find out what went where. Recorded here in case it helps someone and for when, inevitably, I try and do it again in a few months’ time…

Bad photo of something I'm very pleased to have got working :)

Bad photo of something I'm very pleased to have got working :)

Wires

So, not only are there 5 wires instead of 4, but the colour coding is very different too. Opening up the case to the nunchuk and looking at the PCB shows some convenient labels:

GND – brown
SDA – red
SCC – yellow
VDD – blue
also
J1 (seems to be connected to VDD) – white

I managed to break off the white wire at the PCB whilst I was prising off the hot melt glue to look at the labels, and the following worked without re-connecting it…

Code

This post on the Arduino forum shows edits to make to Todbot NunchuckPrint sketch in order to get it to work for third party controllers.

Build

After testing on a breadboard, I soldered the wires to some headers for ease of use later.
With the above code red goes to Analogue 4 and yellow goes to Analogue 5. (Either connect the other two wires to GND and 5V pins, or the code allows for blue to Analogue 3 and brown to Analogue 2.)

And then…

Haven’t quite figured out what I’m going to do with this yet!

Photos of Taste the Game

Taste the Game went really well yesterday and I’ve had loads of positive feedback, which is always nice.

Jumping straight in to planning the next one for the 29th though, so here’s a simple slideshow of my photos and video on the basis that it’ll tell you as much as any words I can put together right now will…

A big thank you to everyone to contributed and took part.


Copyright and permissions:

General blog contents released under a Creative Commons by-nc-sa license. Artworks and other projects copyright Nicola Pugh 2003-2026, all rights reserved.
If in doubt, ask.
The theme used on this WordPress-powered site started off life as Modern Clix, by Rodrigo Galindez.

RSS Feed.