Colony prototype, in Holly’s words

http://www.hideandseek.net/nikki-pughs-colony-prototype/

It’s been deadline central around here for the last couple of weeks, so various things have slipped through the blogging net. Fortunately, Holly Gramazio has written a lovely insightful post outlining precisely what what going on last Tuesday:

We went out in a group of four, and wandered around, occasionally passing the bundle between us – just to see what it was like, how the vibrations felt, whether people looked at us oddly or didn’t notice, whether we felt friendly and warm towards the bundle or annoyed by it. In the end we wandered arond for an hour or so, everyone taking a couple of turns with the bundle.

The first thing we noticed was that was that holding the bundle gives you an immense feeling of entitlement. Only you can tell when it’s vibrating; only you can interpret its whims. Is it happy? Which way does it want to go? Does it have a name, and if so, what is it? Holding the bundle makes you feel like these are your decisions to make, even when you know perfectly well that the vibrations are random and you’re interpreting them pretty much as you like. It invests you with power.

Please go and read the whole thing!

Colony prototyping #1

I’ve been developing a project that investigates taking the phenomena I use to generate work such as Uncertain Eastside and 19,264 seconds of qualitative and quantitative data (Curzon Street, 2010) and turning it into a real-time experience as you move through the landscape.

The early stages of this are supported by Fierce’s Platinum development programme and yesterday was a sharing event to which guests were invited to sample the nascent work from the 6 artists taking part and offer constructive criticism and feedback.

Many thanks to all those who walked the streets of Digbeth with me and my bubblewrap-encased GPS receivers and vibration motors sharing ideas and exploring possibilities. Here are a few photos from the day:

Create locative art

Create Locative art

I’ve been working with the effects caused by the landscape on GPS data to generate line drawings/maps of the terrain for a while now and am feeling the need to push at a few edges and see how else I can apply this phenomenon.

Over the last few days I’ve made the first steps towards making a system that allows the data to be compared and expressed in real time, rather than requiring me to wait until I get back to a (larger) computer to process and visualise the output.

The whole world in my hand - an eye opener to see a stripped-down GPS module and a bit of a brain-bender to try and comprehend what it's capable of doing - so easy to take it for granted when it's hidden away in a satnav or phone...

I’m now the proud owner of a GPS module and a logging shield for Arduino, both of which I’ve managed to get set up and working together to record position.

Testing: GPS module (on the windowsill) sending data by serial to the laptop

The next step is to research – and then make happen! – how to get the Arduino to read from two modules at the same time. Wish me luck.

Electronics, circles, people, contexts and vibrating hats

A few months ago fizzPOP – the hackspace I’ve been very involved with over the previous year or two – fizzled out. This left me not only with a slew of new skills and awarenesses of what might be possible, but also a fine collection of amassed bits and bobs.

What it hasn’t left me with is a clear idea of how all this new stuff relates to my art practice.

I’ve done a lot of learning, a lot of tinkering and a lot of making stuff just because I can. Now it’s time to start applying some of that rigour and circularity to the things I do involving electronics, sensors and microprocessors. (I still reserve the right to make flashing superhero cuffs if I want to, but, y’know, I want to make art too…)

I’m on limited resources at the moment and mostly having to make use of what I’ve got to hand, so thoughts returned to a wii nunchuck I’d managed to get an Arduino to read the data from back in August.

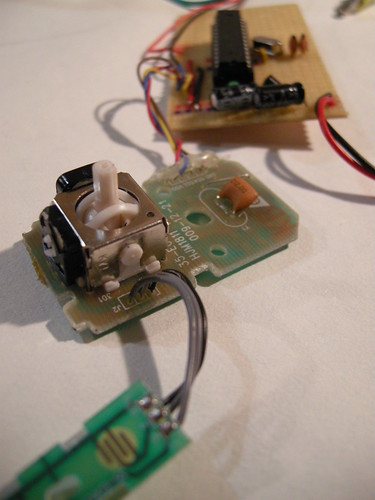
Arduino and nunchuck innards. The microprocessor reads the data from the wii nunchuk's accelerometer and then makes things happen accordingly...

I spent a long time barking up the wrong tree with an idea about modernising the old finishing school thing of balancing a heavy book on your head to improve your posture, however, after a few hours at the internet (and a few more at Central Library), I began to suspect this might be more urban myth than anything else. I couldn’t track down any nice references for it. Also, although in my mind’s eye I could easily see the book with accelerometer in it registering when it was no longer horizontal, I couldn’t figure out what it would do next. What would the output be? Why?

Anyway, at some point this thinking got bumped onto some different tracks and I’ve embarked on a series of concept pieces that I’m hoping will help bridge the gap between learning and Proper Work. This is where the vibrating hat comes in…

Starting point: what if well-known behaviour patterns were actually caused by devices?

Example (involving a vibrating hat): So, you know the pattern when someone’s falling asleep in public: their head nods forward three times and then they wake up with a snort and a small quantity of embarrassment. What if, what if, this is not actually the default behaviour? What if, when left to our own devices, we just keep on nodding? What if aforementioned falling-asleep-in-public person has had the foresight to don a special hat that recognises when nodding has commences and then discreetly wakes that person up rather than leaving them nodding indefinitely?

I’m making that hat.

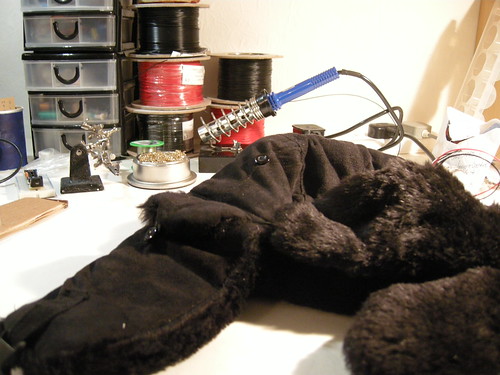
A hat with working circuitry to enable it to detect 3 nods and then buzz the motor to wake you up...

After that I’d like to make a device that reads galvanic skin response and then taps your foot up and down when you’re nervous.

After that I’d like to make a device that… what do you suggest I make? What quirks of human behaviour might it be interesting to consider from another angle? Your thoughts in the comments please!

I’m still pondering what to do with this work once it’s made: I tend to like to see things being put into use. Documentation-wise, I’m thinking something like the way Sputniko! tells stories might work. Anyone up for a train-ride with video camera and vibrating hat?


A quick test of one of the soft switches that go inside the hat's ear flaps. This one is used to toggle the alarm on and off - my next task is to refine the feedback for actions like this.

Blinking bats

A second slice of LED-based Halloween goodness.

Blinking bats from nikkipugh on Vimeo.

These bats will be part of my attire for later today, but they’re really quite pleasing just by themselves!

A really simple build using an Arduino-based Real Bare Bones Board, some cardboard, some insulation tape some wire and 14 LEDs.

Here’s the code:

/*
blinking bats
nikki pugh 30th October, 2010
Attribution-NonCommercial-ShareAlike Creative Commons
Powers LED eyes for a colony of bats, blinking them in a random sequence at random intervals
http://npugh.co.uk/blog/blinking_bats/

LED pairs with 330ohm resistors in series, connected between the output pins and ground.
*/

int colonySize = 7; // How many bats do you have?

//control pins for each bat

int bat1 = 2; // bat1
int bat2 = 3; // bat 2
int bat3 = 4; // bat 3
int bat4 = 5; // bat 4
int bat5 = 6; // bat 5
int bat6 = 7; // bat 6
int bat7 = 8; // bat 7
int bat8 = 9; // bat 8
int bat9 = 10; // bat 9
int bat10 = 11; // bat 10
int bat11 = 12; // bat 11

int gap = 3; // gap before selecting next bat to blink
int colony[] = {bat1, bat2, bat3, bat4, bat5, bat6, bat7, bat8, bat9, bat10, bat11}; // Put bat IDs into an array
int batSelect = 1; // your bat selection variable - used for selecting a bat ID from the above array
int blinker = bat1; // the bat selected to blink
int i = 0; // counter for start-up blinks

void setup() {

randomSeed (analogRead (0)); //read from the (unused) analogue pin to get a value to seed the "pseudo-random number generator"

pinMode(bat1, OUTPUT); // set pins to be outputs
pinMode(bat2, OUTPUT);
pinMode(bat3, OUTPUT);
pinMode(bat4, OUTPUT);
pinMode(bat5, OUTPUT);
pinMode(bat6, OUTPUT);
pinMode(bat7, OUTPUT);
pinMode(bat8, OUTPUT);
pinMode(bat9, OUTPUT);
pinMode(bat10, OUTPUT);
pinMode(bat11, OUTPUT);

}

void loop() {

for (i = 0; i< 3; i ++) { //blink all bats' eyes at start-up digitalWrite(bat1, HIGH); digitalWrite(bat2, HIGH); digitalWrite(bat3, HIGH); digitalWrite(bat4, HIGH); digitalWrite(bat5, HIGH); digitalWrite(bat6, HIGH); digitalWrite(bat7, HIGH); digitalWrite(bat8, HIGH); digitalWrite(bat9, HIGH); digitalWrite(bat10, HIGH); digitalWrite(bat11, HIGH); delay (200); digitalWrite(bat1, LOW); digitalWrite(bat2, LOW); digitalWrite(bat3, LOW); digitalWrite(bat4, LOW); digitalWrite(bat5, LOW); digitalWrite(bat6, LOW); digitalWrite(bat7, LOW); digitalWrite(bat8, LOW); digitalWrite(bat9, LOW); digitalWrite(bat10, LOW); digitalWrite(bat11, LOW); delay (200); } digitalWrite(bat1, HIGH); //all eyes back on again digitalWrite(bat2, HIGH); digitalWrite(bat3, HIGH); digitalWrite(bat4, HIGH); digitalWrite(bat5, HIGH); digitalWrite(bat6, HIGH); digitalWrite(bat7, HIGH); digitalWrite(bat8, HIGH); digitalWrite(bat9, HIGH); digitalWrite(bat10, HIGH); digitalWrite(bat11, HIGH); while (true){ // infinite loop gap = random(1, 5); //wait some seconds before selecting next bat delay(gap*1000); batSelect = random (0, colonySize-1); //select a bat at random blinker = colony[batSelect]; digitalWrite(blinker, LOW); //blink delay(200); digitalWrite(blinker, HIGH); } }

EMF detector

Again for the school-project-that-I-cannot-mention-explicitly-by-name-because-of-Google.

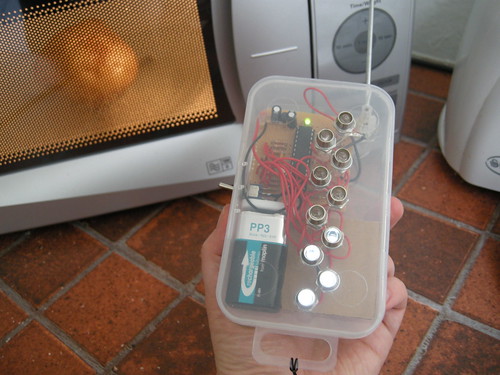
As an extra tool for us to use in our investigation into the unseen, I constructed an Arduino-based electromotive force (emf) detector. I’ve made breadboard versions of this before, but now it was time to build something a little more permanent.

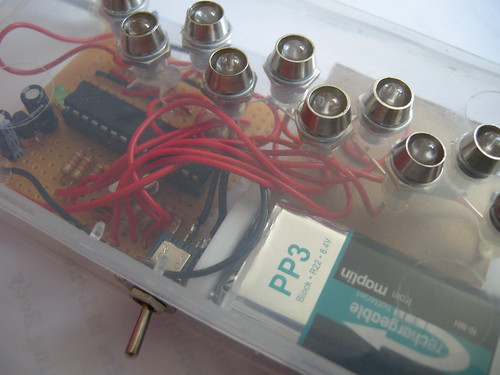
barebones Arduino, 10 LEDs and a plastic case from a pound shop screw set

barebones Arduino, 10 LEDs and a plastic case from a pound shop screw set

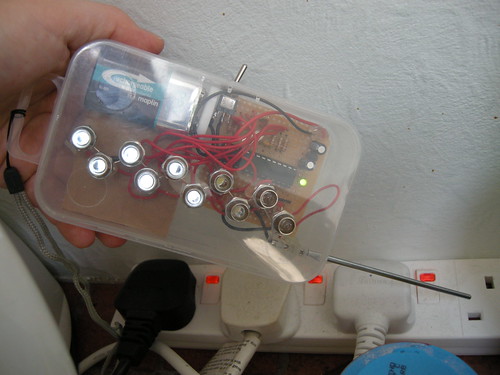
The LEDs light up in proportion to the strength of electromagnetic field detected. Since electrical currents are intrinsically linked with magnetic fields (can’t quite remember my A-level Physics) placing the antenna near to power sockets and electrical items light up some of the LEDs.

4-way gang lights em up

4-way gang lights 'em up

bing

bing

The microwave seems reassuringly well shielded:

But my clock radio and bedside lamp are a tad alarming!

It’s very interesting hunting around the room for different effects. Orientation of the antenna changes the number of lit LEDs, as does switching things on and off. I’m curious to see how the detector responds to big classroom equipment such as smartboards and projectors, but of course the main point is observing how the children respond to being able to visualise things they wouldn’t otherwise be aware of.

Third party nunchuk plus Arduino

I’ve just got an Arduino to read data from a cheap third party wii nunchuk controller.

Because it wasn’t a genuine controller, it had 5 wires instead of 4 and the colours didn’t match with the tutorials [windmeadow] [TodBot Bionic Arduino class 4, pdf] I could find online.

I had to do a bit of experimentation to find out what went where. Recorded here in case it helps someone and for when, inevitably, I try and do it again in a few months’ time…

Bad photo of something I'm very pleased to have got working :)

Bad photo of something I'm very pleased to have got working :)

Wires

So, not only are there 5 wires instead of 4, but the colour coding is very different too. Opening up the case to the nunchuk and looking at the PCB shows some convenient labels:

GND – brown
SDA – red
SCC – yellow
VDD – blue
also
J1 (seems to be connected to VDD) – white

I managed to break off the white wire at the PCB whilst I was prising off the hot melt glue to look at the labels, and the following worked without re-connecting it…

Code

This post on the Arduino forum shows edits to make to Todbot NunchuckPrint sketch in order to get it to work for third party controllers.

Build

After testing on a breadboard, I soldered the wires to some headers for ease of use later.
With the above code red goes to Analogue 4 and yellow goes to Analogue 5. (Either connect the other two wires to GND and 5V pins, or the code allows for blue to Analogue 3 and brown to Analogue 2.)

And then…

Haven’t quite figured out what I’m going to do with this yet!

The Secret Knock in the Box talks back

Remember the Secret Knock in A Box? Over the last couple of months I’ve had the support of Aston University’s School of Engineering & Applied Science to make a prototype PCB so that I can develop a kit for making it.

Here’s the first one we’ve made:

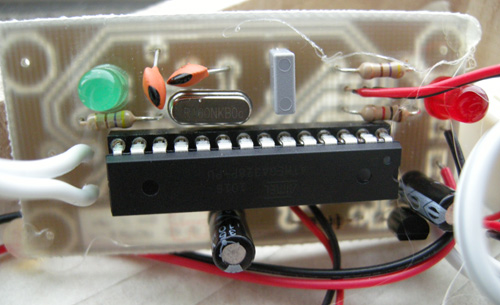
First PCB design (with additional hot melt glue strands, for effect)

First PCB design (with additional hot melt glue strands, for effect)

The basic circuit works and I’m also trying out a piezo element as the knock detector. It’s very sensitive!

As well as adjusting the sensitivity, I want to explore how the box responds when you give it the correct secret knock: should it unlock itself? should it disarm an alarm? should it … ?

Here’s a little experiment towards making it knock back. Thanks to GB and his help, last night at fizzPOP we managed to get the box to buzz back the correct knock once it had been entered.

Responding Secret Knock in the Box from nikkipugh on Vimeo.

Next step is probably to get to grip with transistors so I can then include a solenoid to knock instead of buzz.

The Bloop galleries

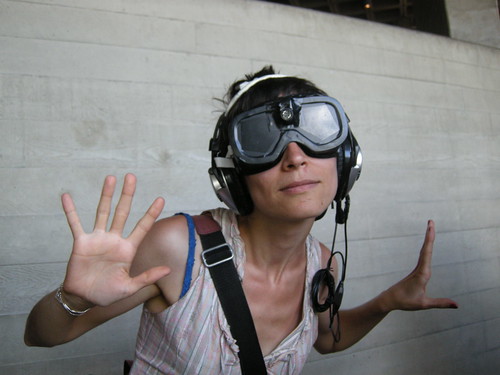
I’ve been compiling photos other people have taken of The Bloop game and sonar goggle experiments I did at the Hide&Seek Weekender into some Flickr galleries.

The Bloop at the Weekender #1
The Bloop at the Weekender #2
Sonar Goggle Experiments at the Weekender

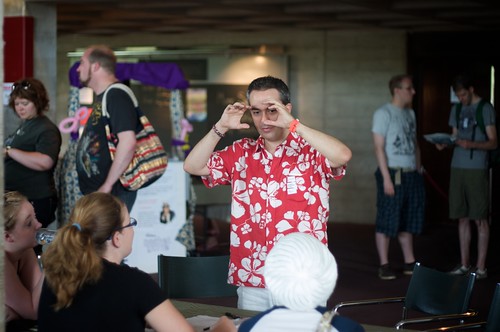
It’s always good to see your events from the perspective of others and there are some really nice shots in there. Here are a selection of my favourites – click on them to go through to the source on Flickr.

Whales Ahoy!

The Bloop

Wining Whale

Hide and Seek

Find Each Other

Thanks again to everyone who took part – either as player or audience.

Two days of sonar goggles at the National Theatre

Last weekend I ran 2 games of The Bloop as part of Hide&Seek’s 2.5 day celebration of all that is playful.

Following oblique coverage in the Guardian and footage of the playtest at Warwick Arts Centre, demand for places far outnumbered the availability, even though I was asked to squeeze another 8 players in.

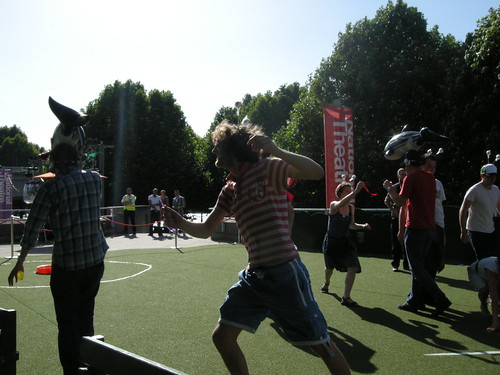
To be honest I don’t remember a whole lot from the games themselves: the sun shone; a tale was spun; krill jumped as far as they could and the whales swam. There were smiles; there was laughter; there were gasps; there were winces. Loads of people came up to me afterwards to tell me how much fun they had had!

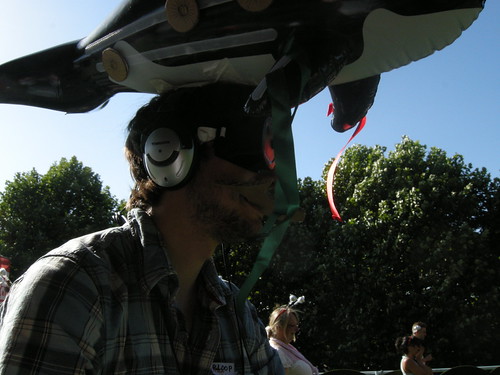
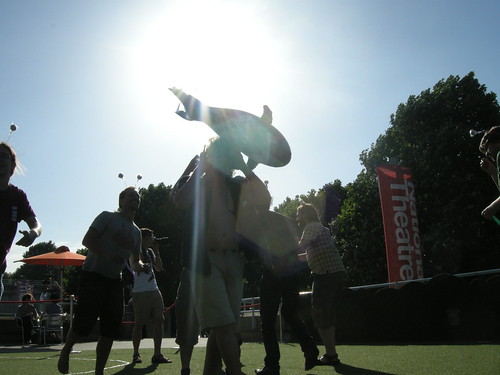
Here are a few snapshots:

A krill pounces.

A krill pounces.

A whale heads from the feeding grounds towards the sound of Serge Gainsbourg.

A whale heads from the feeding grounds towards the sound of Serge Gainsbourg.

A whale makes a bid for freedom.

A whale makes a bid for freedom.

A big thanks to my 3 assistants for fetching barnacles and catching whales for the duration. The rest of my photos can be found on Flickr.

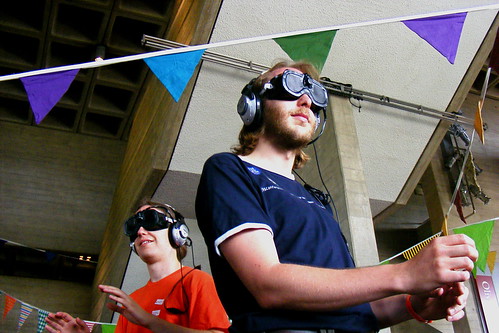
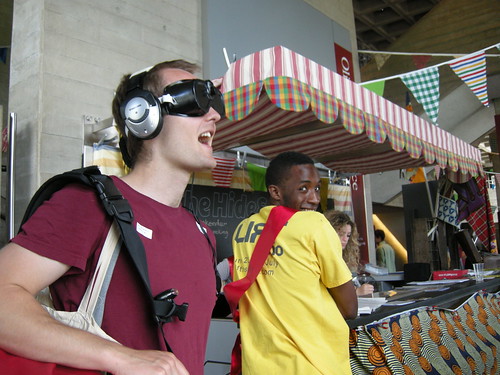
Since so many people missed out on whaling on the Saturday, I took 3 pairs of sonar goggles with me when I returned for the Sunday games. In the hour or two of gaps I had between whispering ‘patatas’, looking for invisible golf holes and trying to find my queen, I invited people to come and try them out.

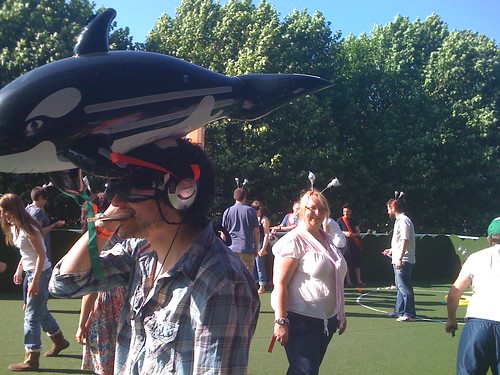
This quickly turned into trying to find new ways of playing with them. This is what I like about the Weekender: there’s a really nice balance of people who want to figure out new ways of playing; people who will try out those new things, people who will ask “hey, what are you guys doing, can I join in?” and people who will interact from the sidelines in a good humoured manner. Hat tip to Giacomo for his catalytic skills and enthusiasm.

Shireen models the sonar goggles

Shireen models the sonar goggles

Dont mind us, were just trying something out...

Don't mind us, we're just trying something out...

The first experiment that evolved was to release two be-goggled people into vaguely the same space and see if they could find eachother:

The answer appeared to be, “er, not really”.

We soon gained some more interested people, so we then used all three pairs of goggles and had enough extras to act as chaperones for the next experiment. A race across the room to the cordon in front of the doors:

Fun and interesting on a range of different levels and in a variety of different directions!

The rope area became involved in a live link-up game in Delhi so we adjusted our course and the next video is a snippet of trying to navigate about three quarters of the way around the Olivier Foyer:

So much to like! Thanks to everyone who contributed.

Stand by for more sonar goggliness as we build on these experiments to develop a full-blown game…


Copyright and permissions:

General blog contents released under a Creative Commons by-nc-sa license. Artworks and other projects copyright Nicola Pugh 2003-2026, all rights reserved.
If in doubt, ask.
The theme used on this WordPress-powered site started off life as Modern Clix, by Rodrigo Galindez.

RSS Feed.